Logo era una aplicación que consistia en un cursor gráfico (llamado tortuga) que mediante unas instrucciones que le ibamos dando nos creaba un dibujo.
Creamos un nuevo proyecto de tipo JFrame y de nombre "Principal". En vista de diseño se agrega un jButton y un jPanel. Y finalmente se crea una nueva clase que se llame "Tortuga".
Codigo 1 (Principal.java):
package Tortuga;
public class Principal extends javax.swing.JFrame {
Tortuga t;
public Principal() {
initComponents();
this.setLocationRelativeTo(null);
t = new Tortuga(
jPanel1.getGraphics(),
jPanel1.getWidth() / 2,
jPanel1.getHeight() - 20, 0);
}
private void initComponents() { ... }
private void jButtonIniciarActionPerformed(java.awt.event.ActionEvent evt) {
//Instrucciones tipo tortuga que dibuja una casa.
t.gira(0);
t.traza(100);
t.gira(90);
t.traza(100);
t.gira(45);
t.traza(100);
t.gira(90);
t.traza(100);
t.gira(45);
t.traza(100);
t.gira(90);
t.traza(50);
}
public static void main(String args[]) {
java.awt.EventQueue.invokeLater(new Runnable() {
public void run() {
new Principal().setVisible(true);
}
});
}
// Variables declaration - do not modify
private javax.swing.JButton jButtonIniciar;
private javax.swing.JPanel jPanel1;
// End of variables declaration
}
Codigo 2 (Tortuga.java):
package Tortuga;
import java.awt.BasicStroke;
import java.awt.Graphics;
import java.awt.Graphics2D;
import java.awt.RenderingHints;
public class Tortuga {
double x, y, angulo;
Graphics g;
public Tortuga(Graphics g, double x, double y, double angulo) {
this.x = x;
this.y = y;
this.angulo = angulo * Math.PI / 180;
this.g = g;
Graphics2D g2 = (Graphics2D) g;
g2.setRenderingHint(
RenderingHints.KEY_ANTIALIASING,
RenderingHints.VALUE_ANTIALIAS_ON);//Filtro antialiasing
g2.setStroke(new BasicStroke((float) 5)); //Grosor pincel
}
public void gira(double angulo) {
this.angulo += angulo * Math.PI / 180;
}
public void traza(double distancia) {
double x2 = x + distancia * Math.cos(angulo);
double y2 = y - distancia * Math.sin(angulo);
g.drawLine((int) x2, (int) y2, (int) x, (int) y);
salta(x2, y2);
}
public void salta(double x, double y) {
this.x = x;
this.y = y;
}
}
Resultado:
Creamos un nuevo proyecto y en vista de diseño se agrega un jButton y un jPanel.
Codigo1 (Principal.java):
package Recortar;
public class Principal extends javax.swing.JFrame {
public Principal() {
initComponents();
this.setLocationRelativeTo(null);
}
private void initComponents() { ... }
private void jButtonIniciarActionPerformed(java.awt.event.ActionEvent evt) {
Imagen im = new Imagen(jPanel1);
jPanel1.add(im).repaint();
}
public static void main(String args[]) {
java.awt.EventQueue.invokeLater(new Runnable() {
public void run() {
new Principal().setVisible(true);
}
});
}
// Variables declaration - do not modify
private javax.swing.JButton jButtonIniciar;
private javax.swing.JPanel jPanel1;
// End of variables declaration
}
Codigo 2 (Imagen.java):
package Guardar;
import java.awt.BasicStroke;
import java.awt.Color;
import java.awt.Graphics;
import java.awt.Graphics2D;
import java.awt.RenderingHints;
import java.awt.Stroke;
import java.awt.image.BufferedImage;
import java.io.File;
import java.io.IOException;
import javax.imageio.ImageIO;
import javax.swing.JPanel;
public class Imagen extends javax.swing.JPanel {
int x, y;
public Imagen(JPanel jPanel1) {
this.x = jPanel1.getWidth();
this.y = jPanel1.getHeight();
this.setSize(x, y);
}
@Override
public void paint(Graphics g) {
try {
// Se carga la imagen original
BufferedImage imagen;
File f = new File("src/Images/imagen1.png");
imagen = ImageIO.read(f);
Graphics2D g2 = (Graphics2D) imagen.getGraphics();
// Se modifica la imagen original
Stroke stroke = new BasicStroke((float) 20); // Grosor pincel
g2.setStroke(stroke);
g2.setColor(Color.RED);
g2.setRenderingHint(
RenderingHints.KEY_ANTIALIASING,
RenderingHints.VALUE_ANTIALIAS_ON); // Filtro antialiasing
g2.drawLine(0, 0, imagen.getWidth(), imagen.getHeight()); // Línea diagonal
// Se guarda la imagen y se imprime en el jPanel
ImageIO.write(imagen, "png", new File("imagen2.png"));
g.drawImage(imagen, 0, 0, this);
} catch (IOException ex) { }
}
}
Resultado:
Creamos un nuevo proyecto y en vista de diseño se agrega un jButton y un jPanel.
Codigo1 (Principal.java):
package Recortar;
public class Principal extends javax.swing.JFrame {
public Principal() {
initComponents();
this.setLocationRelativeTo(null);
}
private void initComponents() { ... }
private void jButtonIniciarActionPerformed(java.awt.event.ActionEvent evt) {
Imagen im = new Imagen(jPanel1);
jPanel1.add(im).repaint();
}
public static void main(String args[]) {
java.awt.EventQueue.invokeLater(new Runnable() {
public void run() {
new Principal().setVisible(true);
}
});
}
// Variables declaration - do not modify
private javax.swing.JButton jButtonIniciar;
private javax.swing.JPanel jPanel1;
// End of variables declaration
}
Codigo 2 (Imagen.java):
package Recortar;
import java.awt.Graphics;
import java.awt.image.BufferedImage;
import java.io.File;
import java.io.IOException;
import javax.imageio.ImageIO;
import javax.swing.JPanel;
public class Imagen extends javax.swing.JPanel {
int x, y;
public Imagen(JPanel jPanel1) {
this.x = jPanel1.getWidth();
this.y = jPanel1.getHeight();
this.setSize(x, y);
}
@Override
public void paint(Graphics g) {
BufferedImage imagen, recorte;
try {
File f = new File("src/Images/imagen1.png");
imagen = ImageIO.read(f);
g.drawImage(imagen, 0, 0, this);
recorte = ((BufferedImage) imagen).getSubimage(150, 150, 150, 150);
g.drawImage(recorte, 0, 0, this);
} catch (IOException ex) { }
}
}
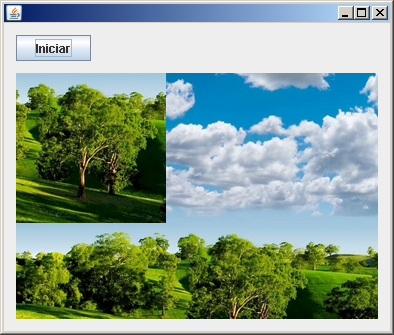
Resultado:
Este nuevo proyecto consta de un jButton, un jPanel y una imagen cualquiera (.png).
Este ejemplo es parecido al anterior pero cargando la imagen con "BufferedImage", para luego crear un "filtro" mediante modificación del color de pixeles de la imagen.
Codigo (Principal.java):
package Filtro1;
public class Principal extends javax.swing.JFrame {
public Principal() {
initComponents();
this.setLocationRelativeTo(null);
}
private void initComponents() { ... }
private void jButtonIniciarActionPerformed(java.awt.event.ActionEvent evt) {
Imagen im = new Imagen(jPanel1);
jPanel1.add(im).repaint();
}
public static void main(String args[]) {
java.awt.EventQueue.invokeLater(new Runnable() {
public void run() {
new Principal().setVisible(true);
}
});
}
// Variables declaration - do not modify
private javax.swing.JButton jButtonIniciar;
private javax.swing.JPanel jPanel1;
// End of variables declaration
}
Codigo 2 (imagen.java):
package Filtro1;
import java.awt.Graphics;
import java.awt.image.BufferedImage;
import java.io.File;
import java.io.IOException;
import java.util.logging.Level;
import java.util.logging.Logger;
import javax.imageio.ImageIO;
import javax.swing.JPanel;
public class Imagen extends javax.swing.JPanel {
int x, y;
public Imagen(JPanel jPanel1) {
this.x = jPanel1.getWidth();
this.y = jPanel1.getHeight();
this.setSize(x, y);
}
@Override
public void paint(Graphics g) {
try {
BufferedImage image = ImageIO.read(new File("src/Images/imagen1.png"));
int color;
for (int j = 0; j < image.getHeight(); j = j + 2) {
for (int i = x / 2; i < image.getWidth(); i++) {
color = image.getRGB(i, j);
image.setRGB(i, j, color - 150);
}
}
g.drawImage(image, 0, 0, this);
} catch (IOException ex) {
Logger.getLogger(Imagen.class.getName()).log(Level.SEVERE, null, ex);
}
}
}
Resultado:
Se crea un nuevo proyecto en Netbeans y en vista de diseño se agrega un jButton y un jPanel.
Una vez hecho esto se crea una nueva carpeta llamada "Images". Dentro esta carpeta le agregamos una imagen en formato .PNG (se inserta directamente arrastrando la imagen a la carpeta).
Codigo 1. (Principal.java):
package Imagen1;
public class Principal extends javax.swing.JFrame {
public Principal() {
initComponents();
this.setLocationRelativeTo(null); // Centrar pantalla
}
private void initComponents() { ... } // Codigo generado automaticamente.
private void jButtonIniciarActionPerformed(java.awt.event.ActionEvent evt) {
Imagen im = new Imagen(jPanel1);
jPanel1.add(im).repaint();
}
public static void main(String args[]) {
java.awt.EventQueue.invokeLater(new Runnable() {
public void run() {
new Principal().setVisible(true);
}
});
}
// Variables declaration - do not modify
private javax.swing.JButton jButtonIniciar;
private javax.swing.JPanel jPanel1;
// End of variables declaration
}
Codigo 2. (Imagen.java):
package Imagen1;
import java.awt.Graphics;
import javax.swing.ImageIcon;
import javax.swing.JPanel;
public class Imagen extends javax.swing.JPanel {
int x, y;
public Imagen(JPanel jPanel1) {
this.x = jPanel1.getWidth();
this.y = jPanel1.getHeight();
this.setSize(x, y);
}
@Override
public void paint(Graphics g) {
ImageIcon Img = new ImageIcon(getClass().getResource("/Images/imagen1.png"));
g.drawImage(Img.getImage(), 0, 0, x, y, null);
}
}
Resultado:
Se crea un nuevo proyecto en Netbeans y en vista de diseño se agrega un jButton y un jPanel.
Codigo 1 (Principal.java):
package CurvaHilbert;
public class Principal extends javax.swing.JFrame {
int x, y, depth, size;
public Principal() {
initComponents();
this.setLocationRelativeTo(null);// Centrar pantalla
}
private void initComponents() { ... }// Codigo generado automaticamente
private void jButtonIniciarActionPerformed(java.awt.event.ActionEvent evt){
Dibujo.Dibujar(
jPanel1.getGraphics(),
x = jPanel1.getWidth() / 2,
y = jPanel1.getHeight() / 2,
depth = 4,
size = jPanel1.getHeight() / 2);
}
public static void main(String args[]) {
java.awt.EventQueue.invokeLater(new Runnable() {
public void run() {
new Principal().setVisible(true);
}
});
}
// Variables declaration - do not modify
private javax.swing.JButton jButtonIniciar;
private javax.swing.JPanel jPanel1;
// End of variables declaration
}
Codigo 2 (Dibujo.java):
package CurvaHilbert;
import java.awt.Graphics;
public class Dibujo {
public static void Dibujar(Graphics g, int x, int y, int n, int size) {
if (n == 0) return;
int x0 = x - size / 2;
int x1 = x + size / 2;
int y0 = y - size / 2;
int y1 = y + size / 2;
g.drawLine(x0, y0, x0, y1);
g.drawLine(x1, y0, x1, y1);
g.drawLine(x0, y, x1, y);
Dibujar(g, x0, y0, n - 1, size / 2);
Dibujar(g, x0, y1, n - 1, size / 2);
Dibujar(g, x1, y0, n - 1, size / 2);
Dibujar(g, x1, y1, n - 1, size / 2);
}
}
Resultado:
Se crea un nuevo proyecto en Netbeans y en vista de diseño se agrega un jButton y un jPanel.
Codigo (FractalFree.java):
package FractalTree;
public class FractalTree extends javax.swing.JFrame {
public FractalTree() {
initComponents();
this.setLocationRelativeTo(null); //Centrar pantalla
}
private void initComponents() { ... } //Codigo generado automáticamente
private void jButtonIniciarActionPerformed(java.awt.event.ActionEvent evt) {
Dibujo.Dibujar(
jPanel1.getGraphics(),
jPanel1.getWidth() / 2,
jPanel1.getHeight(),
-90, 9);
}
public static void main(String args[]) {
java.awt.EventQueue.invokeLater(new Runnable() {
public void run() {
new FractalTree().setVisible(true);
}
});
}
// Variables declaration - do not modify
private javax.swing.JButton jButtonIniciar;
private javax.swing.JPanel jPanel1;
// End of variables declaration
}
Codigo 2 (Dibujo.java):
package FractalTree;
import java.awt.Color;
import java.awt.Graphics;
import java.awt.Graphics2D;
import java.awt.RenderingHints;
public class Dibujo {
public static void Dibujar(Graphics g, int x1, int y1, double angle, int depth) {
if (depth == 0) return;
Graphics2D g2 = (Graphics2D) g;
g.setColor(Color.BLUE);
g2.setRenderingHint(
RenderingHints.KEY_ANTIALIASING,
RenderingHints.VALUE_ANTIALIAS_ON);//Filtro antialiasing
int x2 = x1 + (int) (Math.cos(Math.toRadians(angle)) * depth * 5.0);
int y2 = y1 + (int) (Math.sin(Math.toRadians(angle)) * depth * 5.0);
g2.drawLine(x1, y1, x2, y2);
Dibujar(g2, x2, y2, angle - 20, depth - 1);
Dibujar(g2, x2, y2, angle + 20, depth - 1);
}
}
Resultado:
Este ejemplo consiste en que al pulsar un jButton se crea una imagen aleatoria cualquiera. Normalmente las imagenes que aparecen no tienen sentido, pero de hecho si Java tuviera una aleatoriedad absoluta, tarde o temprano acabarias apareciendo en una de estas imagenes. Y esque en la aleatoriedad esta el TODO. Por poner un ejemplo, para calcular la probabilidad de que aparezca "La Mona Lisa":
P(Mona Lisa) = 1 / {(Numero de Colores RBG)^(Tamaño jPanel)}
P(Mona Lisa) = 1 / { (255 x 255 x 255)^(375 x 250) }
P(Mona Lisa) = 3.75 x 10^(-676840)
Para empezar se crea un nuevo proyecto y en modo de diseño se agrega un jButton y un jPanel.
Codigo 1 (Principal.java):
package imagenesAleatorias;
public class Principal extends javax.swing.JFrame {
public Principal() {
initComponents();
this.setLocationRelativeTo(null); //Centrar pantalla
}
private void initComponents() { ... }//Codigo generado automáticamente
private void jButtonIniciarActionPerformed(java.awt.event.ActionEvent evt){
Dibujo.Dibujar(jPanel1.getGraphics(),
jPanel1.getWidth(),
jPanel1.getHeight());
}
public static void main(String args[]) {
java.awt.EventQueue.invokeLater(new Runnable() {
public void run() {
new Principal().setVisible(true);
}
});
}
// Variables declaration - do not modify
private javax.swing.JButton jButtonIniciar;
private javax.swing.JPanel jPanel1;
// End of variables declaration
}
Codigo 2 (Dibujo.java):
package imagenesAleatorias;
import java.awt.Color;
import java.awt.Graphics;
public class Dibujo {
public static void Dibujar(Graphics g, int width, int height) {
for (int i = 0; i < width; i++) {
for (int j = 0; j < height; j++) {
g.setColor(new Color(
(float) Math.random(),
(float) Math.random(),
(float) Math.random()));
g.fillRect(i, j, 1, 1); //dibuja pixel
}
}
}
}
Resultado:
Se crea un nuevo proyecto en Netbeans y en vista de diseño se agrega un jButton y un jPanel.
Codigo 1 (Principal.java):
package graficos1;
public class Principal extends javax.swing.JFrame {
public Principal() {
initComponents();
this.setLocationRelativeTo(null); //Centrar pantalla
}
@SuppressWarnings("unchecked")
private void initComponents() {...}
private void jButtonIniciarMouseClicked(java.awt.event.MouseEvent evt) {
Dibujo.Dibujar(jPanel1.getGraphics(), jPanel1.getWidth(), jPanel1.getHeight());
}
public static void main(String args[]) {
java.awt.EventQueue.invokeLater(new Runnable() {
public void run() {
new Principal().setVisible(true);
}
});
}
// Variables declaration - do not modify
private javax.swing.JButton jButtonIniciar;
private javax.swing.JPanel jPanel1;
// End of variables declaration
}
Codigo 2 (Dibujo.java):
package graficos1;
import java.awt.Color;
import java.awt.Graphics;
import java.awt.Graphics2D;
import java.awt.RenderingHints;
public class Dibujo {
public static void Dibujar(Graphics g, int width, int height) {
Graphics2D g2 = (Graphics2D) g;
g2.setRenderingHint(RenderingHints.KEY_ANTIALIASING, RenderingHints.VALUE_ANTIALIAS_ON);
g2.setColor(Color.BLUE);
int pasos = 25000, pos;
int w = width / 2;
int h = height / 2;
for (int i = 0; i < pasos; i++) {
pos = (int) Math.floor(Math.random() * 8 + 1);
switch (pos) {
case 1:
w--;
h++;
break;
case 2:
h++;
break;
case 3:
w++;
h++;
break;
case 4:
w++;
break;
case 5:
w++;
h--;
break;
case 6:
h--;
break;
case 7:
w--;
h--;
break;
case 8:
w--;
break;
}
//Dibuja un punto
g2.fillOval(w, h, 1, 1);
//Control laterales
w = (w > width) ? 1 : w;
w = (w < 1) ? width : w;
h = (h > height) ? 1 : h;
h = (h < 1) ? height : h;
}
}
}
Resultado:
Esta vez vamos a ver como funciona un sistema neuronal teniendo los pesos ya calibrados especificamente para la resolución de puertas lógicas XOR. El funcionamiento es el siguiente:
Voy a utilizar la notación bipolar(1,-1), que es la más usada en las redes neuronales artificiales por varias razones de peso y es que tiene un rango mayor, es más eficiente y más preciso que la notación binaria(0,1). Para la resolución del problema he elegido el Perceptrón Multicapa siguiente:
He puesto dos neuronas en la capa oculta siguiendo una regla que suele dar buenos resultados que es la de multiplicar el número de entradas por el número de neuronas de salida, y así obtenemos el número de neuronas a poner en la capa central (llamada oculta):
H = N * M
H = 2 * 1
H = 2
N = Número de Entradas (2)
M = Número de Neuronas de Salida (1)
H = Número de Neuronas de la Capa Oculta.
Y un último detalle es la nomenclatura que suele utilizarse para identificar los pesos de una red neuronal:
En el ejemplo el peso W21 está ubicado entre la primera entrada (x1) y la neurona 2.
Codigo:
//Perceptrón multicapa: Puerta Lógica XOR
package perceptronMultiCapa;
import java.util.Scanner;
public class RNeuronaXor {
public static void main(String[] args) {
//Introducción manual de las entradas x1, x2.
System.out.println("Introduce Entrada X1 (1,-1)): ");
Scanner leerX1 = new Scanner(System.in);
double x1 = Double.parseDouble(leerX1.next());
System.out.println("Introduce Entrada X2 (1,-1): ");
Scanner leerX2 = new Scanner(System.in);
double x2 = Double.parseDouble(leerX2.next());
//Pesos ya calibrados para la resolución de puertas XOR.
double w11 = -1.942779536696304;//Pesos neurona 1
double w12 = -2.4033439922084954;
double θ1 = -2.2690966258542424;
double w21 = 1.476484576128277;//Pesos neurona 2
double w22 = 1.5285706752204653;
double θ2 = -1.2654579142409594;
double w31 = -2.7857541174718032;//Pesos neurona 3
double w32 = -2.81730152144229;
double θ3 = -2.52832962325685;
//Calculo de las salidas de las neuronas
double y1 = Math.tanh((x1 * w11) + (x2 * w12) + (1 * θ1));
double y2 = Math.tanh((x1 * w21) + (x2 * w22) + (1 * θ2));
double y3 = Math.tanh((y1 * w31) + (y2 * w32) + (1 * θ3));
y3 = (y3 >= 0) ? 1 : -1;
//Mostrar resultado
System.out.println("Salida (y3) = " + (int) y3);
}
}
Resultado:
run:
Introduce Entrada X1 (1,-1)):
-1
Introduce Entrada X2 (1,-1):
1
Salida (y3) = 1
BUILD SUCCESSFUL (total time: 4 seconds)
Codigo:
package vectorpormatriz;
public class VectorPorMatriz {
public static void main(String[] args) {
int[] x = new int[3];
int[][] w = new int[3][4];
int[] h = new int[w[0].length];
String aux = "";
//LLenar con valores aleatorios w, h, x.
for (int i = 0; i < w.length; i++) {
x[i] = (int) Math.floor(Math.random() * 89) + 10;
for (int j = 0; j < w[0].length; j++) {
w[i][j] = (int) Math.floor(Math.random() * 89) + 10;
}
}
//Multiplica x por w
for (int i = 0; i < w[0].length; i++) {
int sum = 0;
for (int j = 0; j < x.length; j++) {
sum += x[j] * w[j][i];
}
h[i] = sum;
}
//Mostrar vector
System.out.println("* Vector:");
for (int i = 0; i < x.length; i++) {
aux += " " + x[i];
}
System.out.println(aux);
//Mostrar matriz
System.out.println("\n* Matriz:");
for (int[] m1 : w) {
aux = "";
for (int j = 0; j < w[0].length; j++) {
aux += " " + m1[j];
}
System.out.println(aux);
}
//Mostrar resultado
aux = "";
System.out.println("\n* Vector x Matriz:");
for (int i = 0; i < h.length; i++) {
aux += " " + h[i];
}
System.out.println(aux);
}
}
Resultado:
run:
* Vector:
70 62 39
* Matriz:
34 66 31 59
84 75 27 34
25 54 57 35
* Vector x Matriz:
8563 11376 6067 7603
BUILD SUCCESSFUL (total time: 0 seconds)
Codigo:
//Sumatorio
package sumatorio;
import java.util.Scanner;
public class Sumatorio {
public static void main(String[] args) {
//Inicializar variables
int[] x = new int[5];
for (int i = 1; i < x.length; i++) {
System.out.println("Introduce valor X" + i + ":");
Scanner leer = new Scanner(System.in);
x[i] = Integer.parseInt(leer.next());
}
int n = x.length;
int m = 1;
int sumatorio = 0;
String formula = "";
//Sumatorio
for (int i = m; i < n; i++) {
sumatorio += x[i];
formula += " + " + x[i];
}
System.out.println("\n∑ =" + formula.substring(2) + " = " + sumatorio);
}
}
Resultado:
run:
Introduce valor X1:
23
Introduce valor X2:
61
Introduce valor X3:
7
Introduce valor X4:
99
∑ = 23 + 61 + 7 + 99 = 190
BUILD SUCCESSFUL (total time: 11 seconds)